Saturday, April 30, 2011

Cross Stitch Mother's Day Postcard

for all the crafty moms

Screen shot 2011-04-25 at 7.48.13 PM
In honor of all those crafty mothers out there that made our childhoods and adulthoods so very special, I created a Mother's Day cross stitch postcard which is now available for download!

Tuesday, April 19, 2011

Fabulous Mother's Day Gift Ideas!

Here are some fabulous Mother's Day Gift Ideas:


Message me at:  fabulousjewels@live.ca for more details and to order.

                                  ~ OR ~

Go directly to my website to order:  www.stelladot.com/tammyshannon

Homemade Cadbury Eggs

Homemade Cadbury Eggs


Cadbury

So...confession.

I have never, ever, had a Cadbury Egg.

It's that runny yolk.

I just can't handle it.

I mean, I'm sure they are delicious and all, but I just have a really hard time getting past my yolk issues.

Plus, that bunny in the commercial bothers me. Is he supposed to LAY the Cadbury Eggs, because that just gives me another mental hurdle to overcome. Rabbit hair, and all that. (I'm assuming they don't pop out already wrapped?)


But after I posted my Homemade Peanut Butter Eggs, I had several requests for Cadbury Eggs. I assumed they would be pretty impossible to make, but I Googled it anyways.


Turns out, not so impossible.


I found an awesome recipe and step by step tutorial on Instructibles.com, and I even had all the ingredients on hand.


And listen--I DO realize that Cadbury Eggs are runny in the middle and aren't flat on one side. But it was easier for me to shape them this way, and I really couldn't stomach the egg being all runny and gooey.


So no rude comments, please.


(By the way, whoever left the anonymous comment to me about long nails and jewelry being a "mortal sin" when preparing food--seriously, you totally made me laugh. And then I sprinkled myself with glitter, put on all the jewelry I could find and baked up a giant batch of cookies)

Just barely adapted from Instructables.com

(click here for printable recipe)

INGREDIENTS

1/2 cup light corn syrup
1/4 cup (1/2 stick) salted butter, softened
3 cups powdered sugar
1 teaspoon vanilla
Yellow food coloring
Chocolate candy melts or almond bark


In the bowl of a mixer, cream the butter, corn syrup and vanilla until smooth. Slowly add the powdered sugar and beat on medium low speed until well mixed.


Spoon about a third of the mixture into a separate bowl and color it with yellow food coloring. Refrigerate the white and yellow mixtures for at least an hour, for easier handling.


Roll the yellow mixture into balls and place on a wax paper lined baking sheet. Place in the freezer for 20 minutes or so. Remove from freezer and cover with white candy and form into an egg shape. Freeze eggs for about 30 minutes.


Melt your candy melts or almond bark according to package directions. Place eggs in the chocolate and coat completely. Remove and place back on wax paper lined baking sheet. Place in the refrigerator until chocolate has set.


If you want these runny like traditional Cadbury Eggs, keep at room temperature. The candy mixture in the eggs softens very quickly.


To see step by step photos on Instructibles.com, click HERE.


Now that I've tried the homemade version, I plan on conquering my store bought Cadbury Egg fear this week.

Handprint Trees Wrapped Canvas

My new wall art!
I've had a bare wall in my dining room that needed a little decoration. I'd even picked up a blank canvas on sale that would fit the spot, I was just waiting for inspiration. Luckily, the inspiration came after seeing the beautiful Cherry Blossoms in bloom in Washington, DC this weekend. A little Spring-themed art would be perfect.

I also wanted to incorporate the kids into the project, but I didn't want it to scream " This is kids' artwork!" since it was in the main living area and there's already lots of their artwork on the fridge, in their rooms and around the house. I'm really happy with the way this turned out. I think at first glance, it looks like pretty, 3-dimensional cherry blossoms and then you notice that the trees themselves were made from the kids' handprints. My husband didn't even realize it until I pointed it out to him (but, then again, he's not always the most observant! ;) )

A close up of one of the trees.


Want to know the best part? The whole thing cost me $8. I'd picked up the 12x24" canvas on sale for $6 and the burlap for the background was $2 (plus I have leftovers). The fabric scraps for the trees and blossoms? I actually pulled those from a pile of clothes that were worn out and ready to be donated or trashed.

Corduroys with worn out knees and some stretched-out long johns!


Here's how I did it:

SUPPLIES:
  • 12"x24" canvas (perfect size for three hands, grab a smaller size for one or two)
  • piece of burlap ( I used a yard with plenty leftover)
  • scraps of fabric for handprint trees and flower blossoms
  • hot glue gun
  • iron on adhesive ( I used Heat n Bond Ultra hold)
DIRECTIONS:

1. Trace your child's hand and part of their arm on the paper side of your iron-on adhesive.


2. Iron the Heat n Bond with the handprint onto the wrong side of your tree trunk fabric. Then cut out your tree trunks and set aside.


3. Cut out your burlap to be slightly larger than your canvas. You'll want it large enough to wrap around the sides and onto the back.


4. Wrap your burlap around the canvas. I put a small line of hot glue on the back edge of the canvas, pulled the burlap tight and pressed it onto the glue (using a spoon so the hot glue didn't seep through the holes in the fabric and burn!) I then folded over any excess burlap on the back and glued it down to finish the back a little more.


Burlap wrapped canvas is ready to go!


5. Peel the paper backing off your handprints and iron them in place on the burlap. It actually worked quite well, I just put a potholder under the open part of the canvas to press up and make a more solid surface to press the iron down on.

Our three handprints!


6. Now, get to work cutting out your cherry blossoms. This was definitely the most tedious part, but you don't have to be exact. For the petals, I cut out some puffy, plus sign shapes and then smaller circles of the darker pink and white colors.


7. To make the blossoms, I used a squirt and smush technique. Squirt a bit of hot glue on the darker pink circle, then bunch up and smush on the white circle. Then, squirt a bit more of hot glue in the center of your petals, put your centers in place, then smush and pinch the back part to make your blossom three dimensional.


8. Begin hot gluing your blossoms onto your tree. Keep going until they are filled with the pretty blossoms. I made mine so the trees had a good amount of blossoms, but the handprints were still somewhat visible.


9. And you're finished! You have a pretty Spring wall hanging that captures your child's handprints from this year. What a cute Mother's Day gift this could make for the grandmas! Oh, and I'm totally going to use my leftover burlap to make a Fall wall hanging with Autumn leaves.

"Color Me Happy" Candy filled rings / bits & bobs

Need a little sunshine?
Make these colorful & fun candy jewels.


Wear 'em to make you smile.


Turn them into rings, necklaces, hair pins, badges, you name it.


Here 's how:

supplies list
envirotex lite or epoxy resin
bowl & spoon
surface area to work on that won't be ruined if damaged
(I used a canvas)
candy sprinkles or balls
jewelry hardware (rings,bails,hairpins)
E6000 super glue or other


Grab a throw-away bowl
(or label it for NO food use)
and mix the Envirotex Lite:

equal parts
mix
(This stuff can be found at Hobby Lobby, Michael's, and other craft shops.)


To be safe, don't touch for 24 hrs.


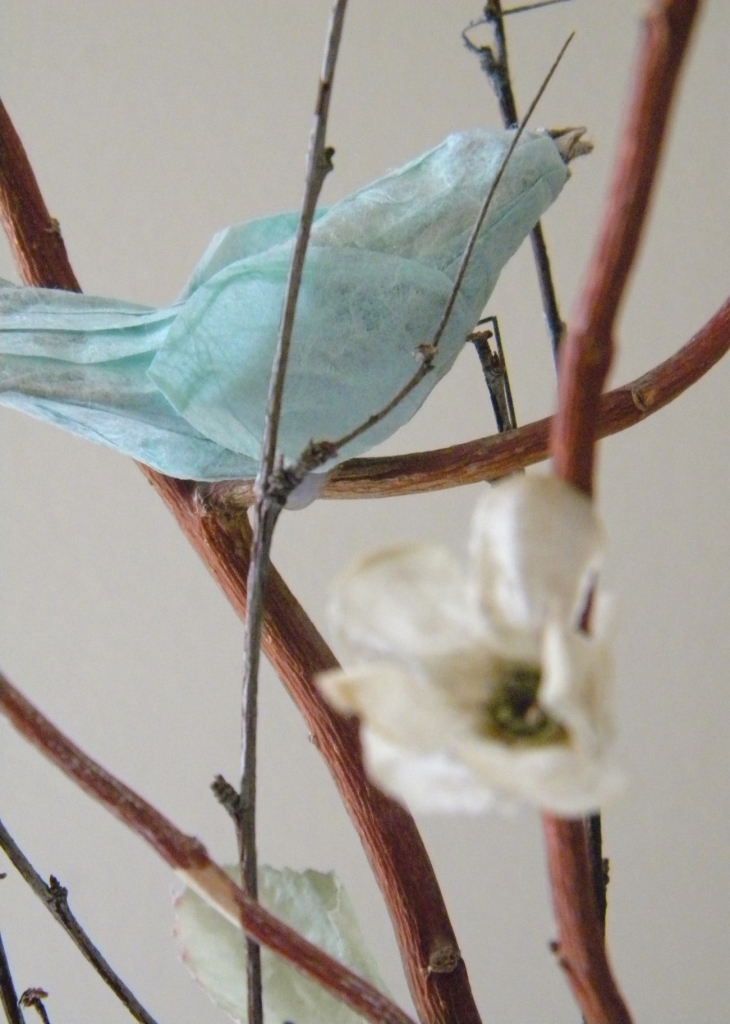
Inkling: paper bird centerpiece


It was time to get serious about a spring table centerpiece and after much thought or at least five minutes of thought - I decided I needed some blue birds.


To make these little paper birds, you will need:

Paper to form the bird (I used kraft paper)
Masking tape
Pretty paper to cover the birds (I used blue rice paper)
Glue

Start by forming a shape of a bird with the kraft paper. I stared with the head, formed the body and left the tail fanned out. I used masking tape to keep the shape together and trimmed the tail.

Cut strips of your pretty paper and glue to your bird shape leaving the beak area uncovered. Form a tiny beak out of the kraft paper and glue onto your bird. Let dry thoroughly.


Use your birds to add a touch of spring to your craft projects or home décor.

I have a feeling I’ll be making more of these little birds and adapting them for all of the seasons.

Egg Shell Mosaic Vase

Egg Shell Mosaic Vase


When Easter is over and all the colored eggs have been collected, you will undoubtedly be making egg salad and tossing all those pretty colorful shells in the garbage or the compost pile. Well don't toss them away just yet! Let them air dry on some paper towels and set them aside in a shallow bowl. Then you can make a pretty egg shell mosaic project, maybe even a vase like this!


My good friends over at DecoArt sent me a bottle of their brand new decoupage medium to try out. I had already set aside all my egg shells, so I sat down on the craft room and got to work.


Do you remember these kitchen utensil holders that I made from plastic beanie baby containers? I have stacks and stacks of these containers in a cabinet in my craft room just waiting to be turned into something fun. I have been using a plain one to hold my scissors, large paintbrushes and box cutters in my craft room. So I decided to jazz it up a bit, and now it doubles as a pretty flower vase too!


First you'll need to dry out your egg shells. After mine were dry I placed them in a shallow container.


Next you'll need a container. I used this plastic beanie baby holder.


I started by painting the plastic container with two coats of white paint (I used Americana Warm White).


The I organized my colors on a paper plate. It's a little time consuming and you'll need to remove any remaining membrane from the back of the shells.


Then paint some decoupage medium onto your painted surface. Place egg shells onto the medium and press in place using the back of your thumbnail.


When you have finished placing all the egg shells onto the painted surface, cover with decoupage medium.

Allow it to dry completely then decoupage the three remaining sides.

To use as a vase, just wrap a pretty bow around the top! Mine is now in my craft room holding my paintbrushes etc. :)